Easy Knit Tie Headband & Ear Warmer Pattern
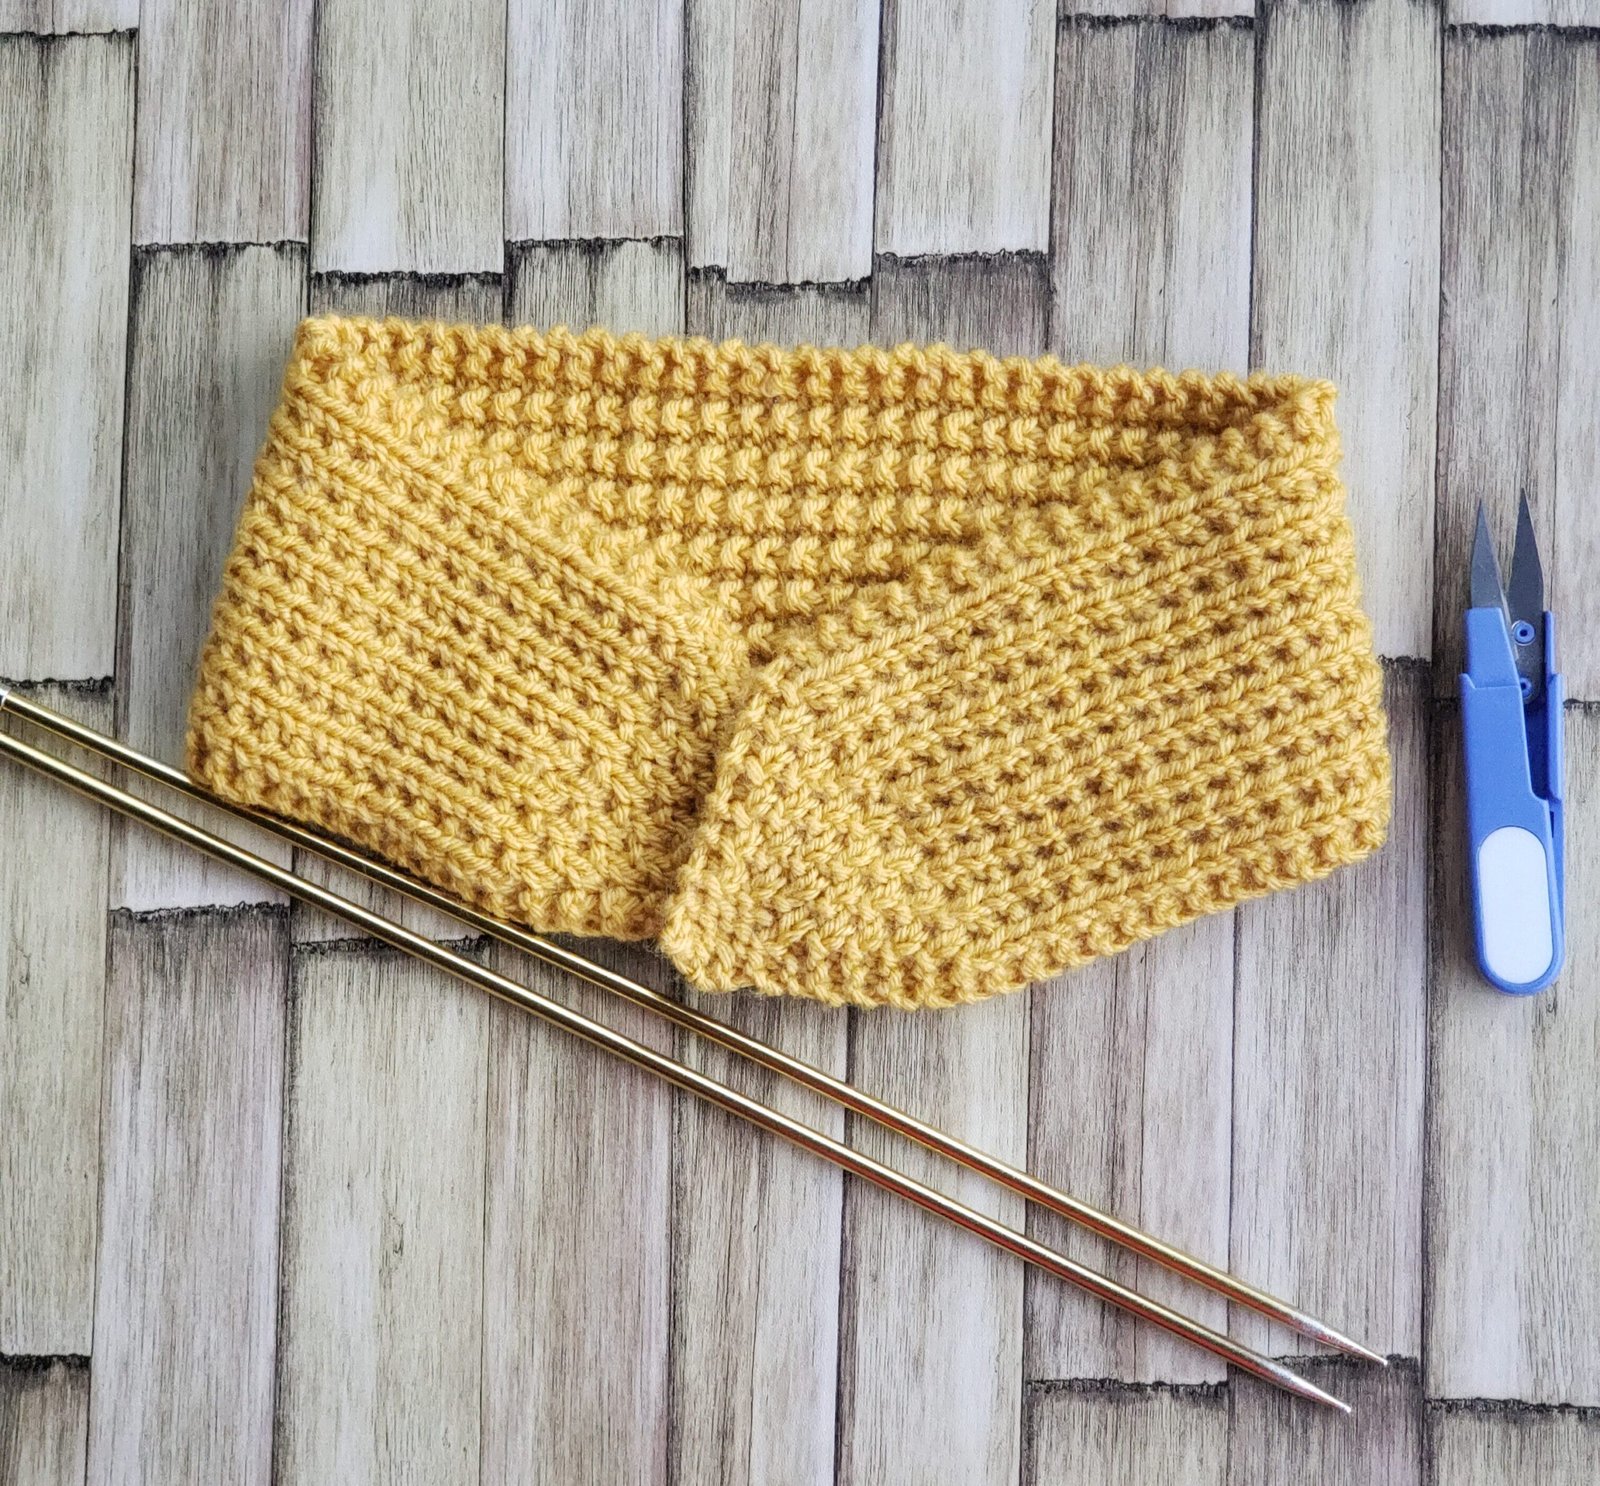
I am so excited to share today’s project with you because this is my very first time designing a headband and ear warmer! When I sat down to create this, I knew I didn’t want to make just another standard seamed tube or twisted ear warmer. I wanted something unique, adjustable, and completely seamless to wear—something that looks like a chic vintage headwrap while keeping your ears warm on chilly mornings.
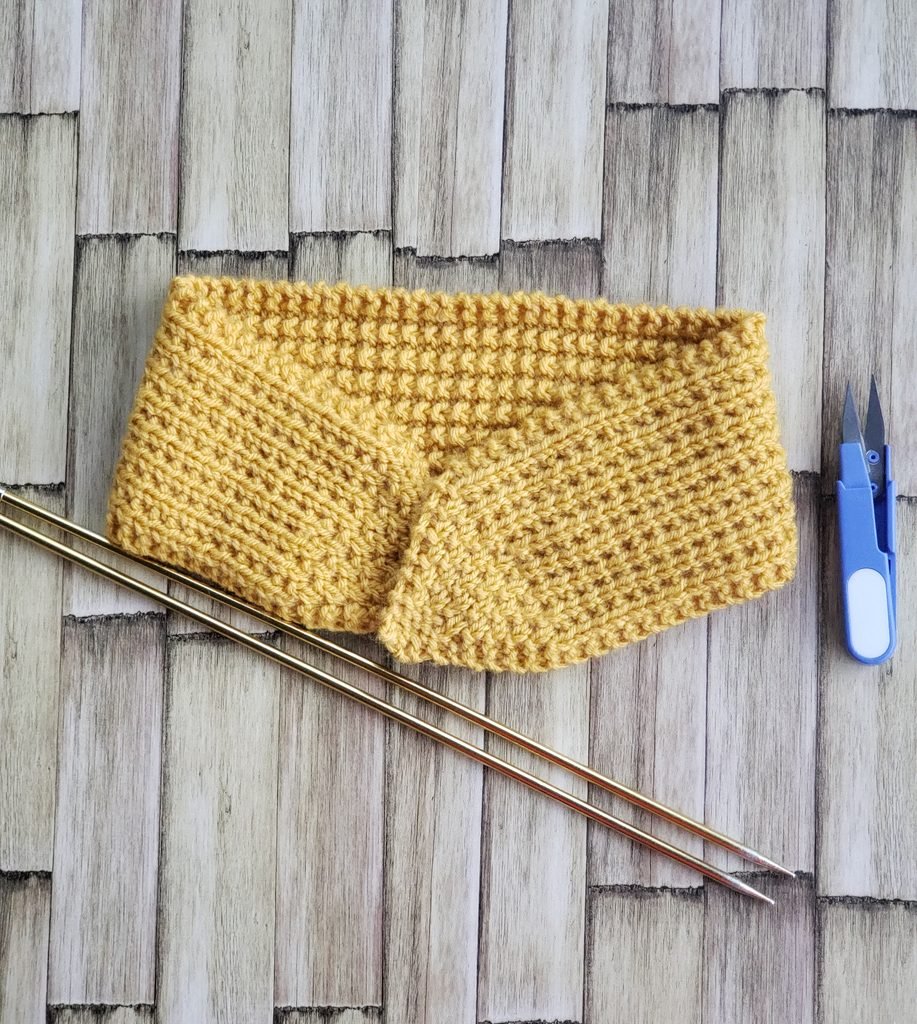
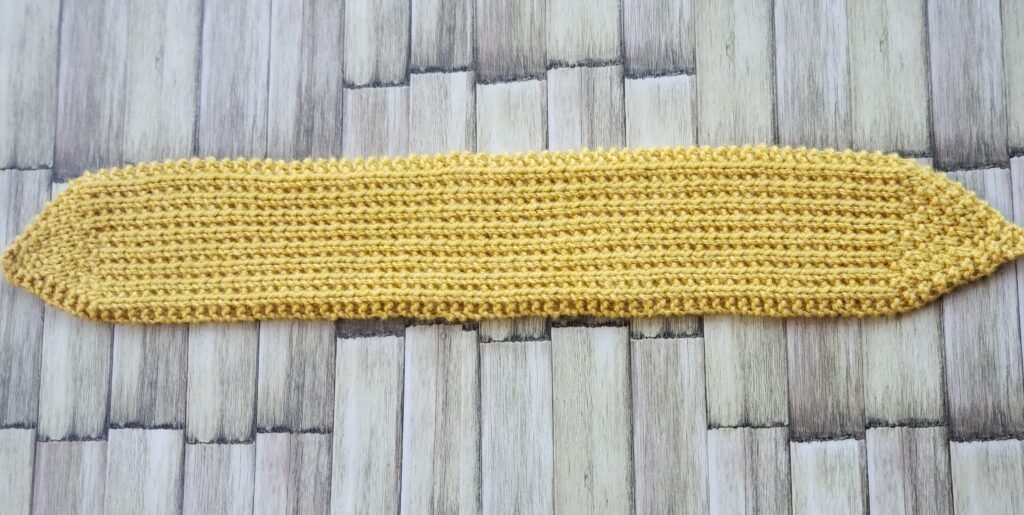
This design is worked flat from one tapered point to the other, expanding to a wide, cozy center and narrowing back down into a slender tie. You can knot it high at the crown for a retro top-knot turban look, or tie it at the nape of your neck beneath your hair for a sleek, minimalist ear band.
If you are a beginner looking to expand beyond basic dishcloths, this project is a fun, satisfying step forward!
Why You’ll Love This Design
- No Seams or Grafting: Knit completely flat from tip to tip on straight needles.
- 100% Adjustable Fit: Because you tie it yourself, there is no worrying about whether it will stretch out or pinch your head.
- Lies Flat Against the Head: The center body is a full 4 inches wide for complete ear coverage, but both ends taper down to just 3 stitches so your knot stays neat and flat instead of feeling like a heavy fist on your head.
- Rich Stitch Definition: The combination of 1×1 broken ribbing and 2-stitch garter borders creates a textured fabric that does not curl along the edges.
📌 Jump straight to the pattern if you’re ready to cast on.
Pattern Details & Materials
- Skill Level: Confident Beginner (must know cast on, knit, purl, simple increases, and decreases)
- Yarn: Worsted Weight (Category 4) — approx. 85–100 yards (shown in Lion Brand Vanna’s Choice, Mustard)
- Needles: US 8 (5.0 mm) straight or circular needles
- Notions: Tapestry needle, scissors, tape measure
- Gauge: Approx. 18 sts and 26 rows = 4 inches in pattern (measured flat)
- Finished Dimensions (Adjustable):
- Width: Approx. 4.15 inches (19 stitches)
- Length: Approx. 23 to 23.5 inches tip-to-tip unstretched (comfortably ties around an adult head 21.5″ to 23.5″)
Sizing Notes
- Customizing Length: The wide body only needs to span from temple to temple around the back of your head and ears so the bulky fabric stops before it reaches your crown.
- For a Smaller Head (Under 22 Inches): Work Section 2 until your piece measures 18 to 19 inches from the cast-on point before beginning Section 3.
- For a Medium/Large Head (22 to 23.5 Inches – Sample Shown): Work Section 2 until your piece measures 20 to 20.5 inches from the cast-on point before beginning Section 3.
Abbreviations (US Terms)
- CO: Cast on
- K: Knit
- P: Purl
- KFB: Knit into front and back of the same stitch (1 stitch increased)
- SSK: Slip, slip, knit (1 stitch decreased; slip 2 stitches knitwise one at a time, insert left needle tip into fronts of both, knit them together)
- K2tog: Knit two stitches together (1 stitch decreased)
- RS: Right side
- WS: Wrong side
- st(s): Stitch(es)
Pattern Instructions
Section 1: First Tapered Tie (Increases)
Cast on 3 sts using the Long-Tail Cast-On.
Row 1 (WS Setup): Knit all 3 sts.
Row 2 (RS – Increase): K1, KFB, K1. (4 sts)
Row 3 (WS): Knit all 4 sts.
Row 4 (RS – Increase): K1, KFB, knit to last 2 sts, KFB, K1. (6 sts)
Row 5 (WS): Knit all 6 sts.
Row 6 (RS – Increase): K1, KFB, knit to last 2 sts, KFB, K1. (8 sts)
Row 7 (WS): K2, P1, K2, P1, K2. (8 sts)
Row 8 (RS – Increase): K1, KFB, knit to last 2 sts, KFB, K1. (10 sts)
Row 9 (WS): K2, P1, *K1, P1*; repeat from * to last 2 sts, K2. (10 sts)
Row 10 (RS – Increase): K1, KFB, knit to last 2 sts, KFB, K1. (12 sts)
Row 11 (WS): K2, P1, *K1, P1*; repeat from * to last 3 sts, K1, K2. (12 sts)
Row 12 (RS – Increase): K1, KFB, knit to last 2 sts, KFB, K1. (14 sts)
Row 13 (WS): K2, P1, *K1, P1*; repeat from * to last 2 sts, K2. (14 sts)
Row 14 (RS – Increase): K1, KFB, knit to last 2 sts, KFB, K1. (16 sts)
Row 15 (WS): K2, P1, *K1, P1*; repeat from * to last 3 sts, K1, K2. (16 sts)
Row 16 (RS – Increase): K1, KFB, knit to last 2 sts, KFB, K1. (18 sts)
Row 17 (WS): K2, P1, *K1, P1*; repeat from * to last 2 sts, K2. (18 sts)
Row 18 (RS – Final Center Increase): K9, KFB, K8. (19 sts) – (Increases 1 stitch at the center to balance the broken rib pattern symmetrically).
Row 19 (WS): K2, P1, *K1, P1*; repeat from * to last 2 sts, K2. (19 sts)
You now have 19 stitches on your needles.
Section 2: Main Body (Straight Section)
Work evenly in the broken rib pattern with garter borders:
Row 1 (RS): Knit all 19 sts.
Row 2 (WS): K2, P1, *K1, P1*; repeat from * to last 2 sts, K2.
Repeat Rows 1 and 2 until the piece measures 20 to 20.5 inches (or your desired length) from the cast-on point, ending after a Row 2 (WS).
Section 3: Second Tapered Tie (Decreases)
This section mirrors Section 1 row-for-row:
Row 1 (RS – Decrease): K8, K2tog, K9. (18 sts)- (Decreases 1 stitch at center to begin tapering)
Row 2 (WS): K2, P1, *K1, P1*; repeat from * to last 2 sts, K2. (18 sts)
Row 3 (RS – Decrease): K1, SSK, knit to last 3 sts, K2tog, K1. (16 sts)
Row 4 (WS): K2, P1, *K1, P1*; repeat from * to last 3 sts, K1, K2. (16 sts)
Row 5 (RS – Decrease): K1, SSK, knit to last 3 sts, K2tog, K1. (14 sts)
Row 6 (WS): K2, P1, *K1, P1*; repeat from * to last 2 sts, K2. (14 sts)
Row 7 (RS – Decrease): K1, SSK, knit to last 3 sts, K2tog, K1. (12 sts)
Row 8 (WS): K2, P1, *K1, P1*; repeat from * to last 3 sts, K1, K2. (12 sts)
Row 9 (RS – Decrease): K1, SSK, knit to last 3 sts, K2tog, K1. (10 sts)
Row 10 (WS): K2, P1, *K1, P1*; repeat from * to last 2 sts, K2. (10 sts)
Row 11 (RS – Decrease): K1, SSK, knit to last 3 sts, K2tog, K1. (8 sts)
Row 12 (WS): K2, P1, K2, P1, K2. (8 sts)
Row 13 (RS – Decrease): K1, SSK, knit to last 3 sts, K2tog, K1. (6 sts)
Row 14 (WS): Knit all 6 sts.
Row 15 (RS – Decrease): K1, SSK, knit to last 3 sts, K2tog, K1. (4 sts)
Row 16 (WS): Knit all 4 sts.
Row 17 (RS – Decrease): K1, K2tog, K1. (3 sts)
Row 18 (WS): Knit all 3 sts.
Finishing
- Bind Off: Bind off the remaining 3 stitches knitwise.
- Weave In Ends: Cut yarn leaving an 8-inch tail. Weave both tail ends along the wrong-side edge of the garter border.
- Blocking Tip: Pin the tapered ends flat and steam lightly with an iron held 1–2 inches away from the fabric (never touch the hot iron directly to acrylic yarn). Let it cool completely to set the points.
How to Style & Tie Your Headband
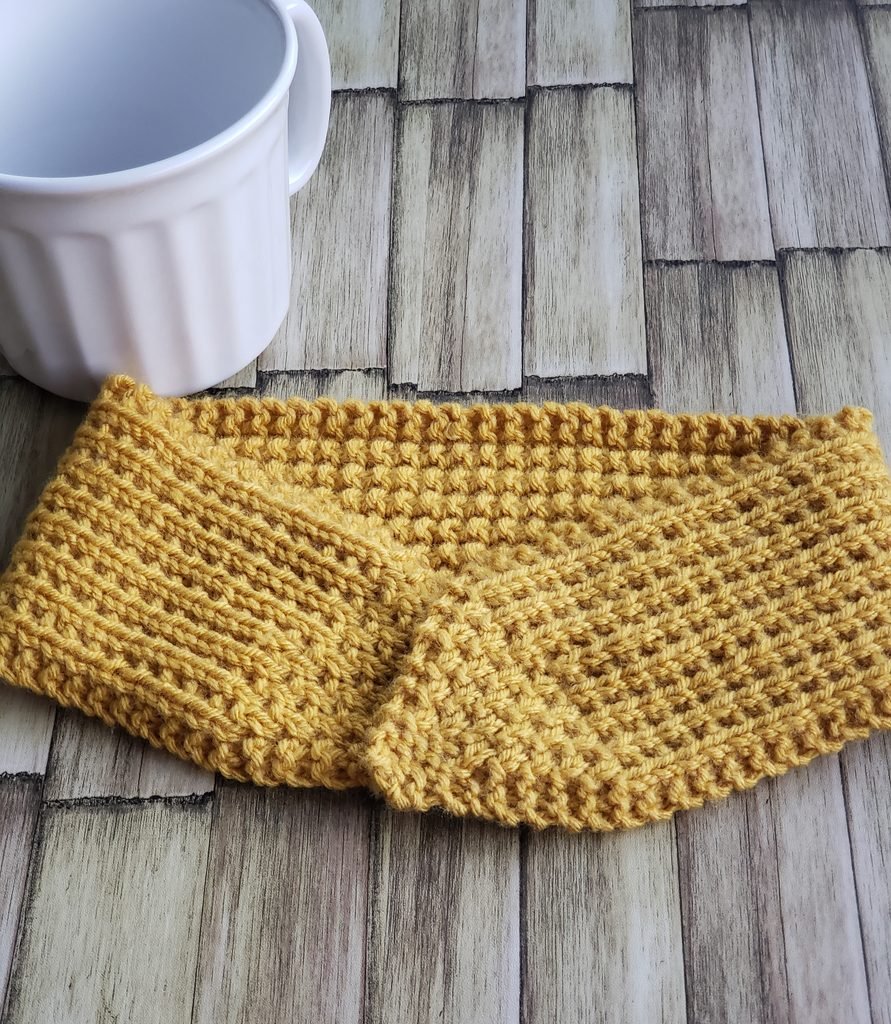
- Front Knot (Top Knot Style): Place the wide center band behind the nape of your neck, sweep the sides over your ears, and bring the narrow points to the top of your head. Tie in a neat square knot (right-over-left, then left-over-right) and fluff the tapered wings out to the sides.
- Back Tie (Minimalist Band): Center the wide band across your forehead and hairline, bring the sides back over your ears, and tie the narrow tips snugly at the base of your skull beneath your hair.
Happy knitting! If you make this headband, be sure to tag me—I’d love to see which colors you choose!